Setting up checklists for work items
This guide walks you from installation to a visible checklist on a work item, including the process and field setup the extension needs to store checklist data.
Prerequisites
- An Azure DevOps organization (cloud) or Azure DevOps Server collection where you can install extensions.
- Permission to install extensions (typically Organization Administrator) or a request to an admin to install Checklist Extension for Azure DevOps from the Visual Studio Marketplace.
These steps describe Azure DevOps Services with an inherited process. If you use Azure DevOps Server or another process model, create equivalent fields in your process and add them to the work item form before mapping templates.
Install the extension
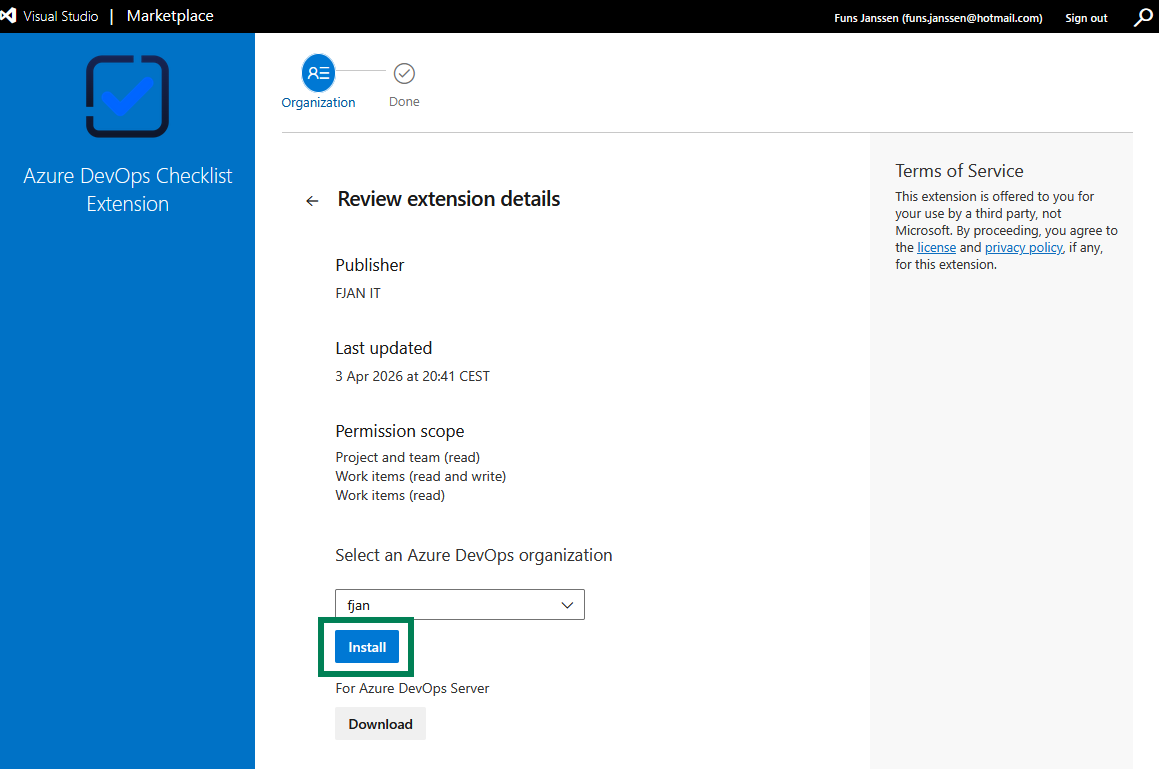
- Open the Marketplace listing.
- Choose Get it free and select your organization (or download the VSIX for Azure DevOps Server, following your admin’s process).
- Complete the installation wizard and accept permissions. The extension needs access to work items and project data so it can show checklists and save templates.
After installation, every project in the organization can use the extension. Template management is done per project, but the work item fields themselves come from your Azure DevOps process.
Open checklist template management
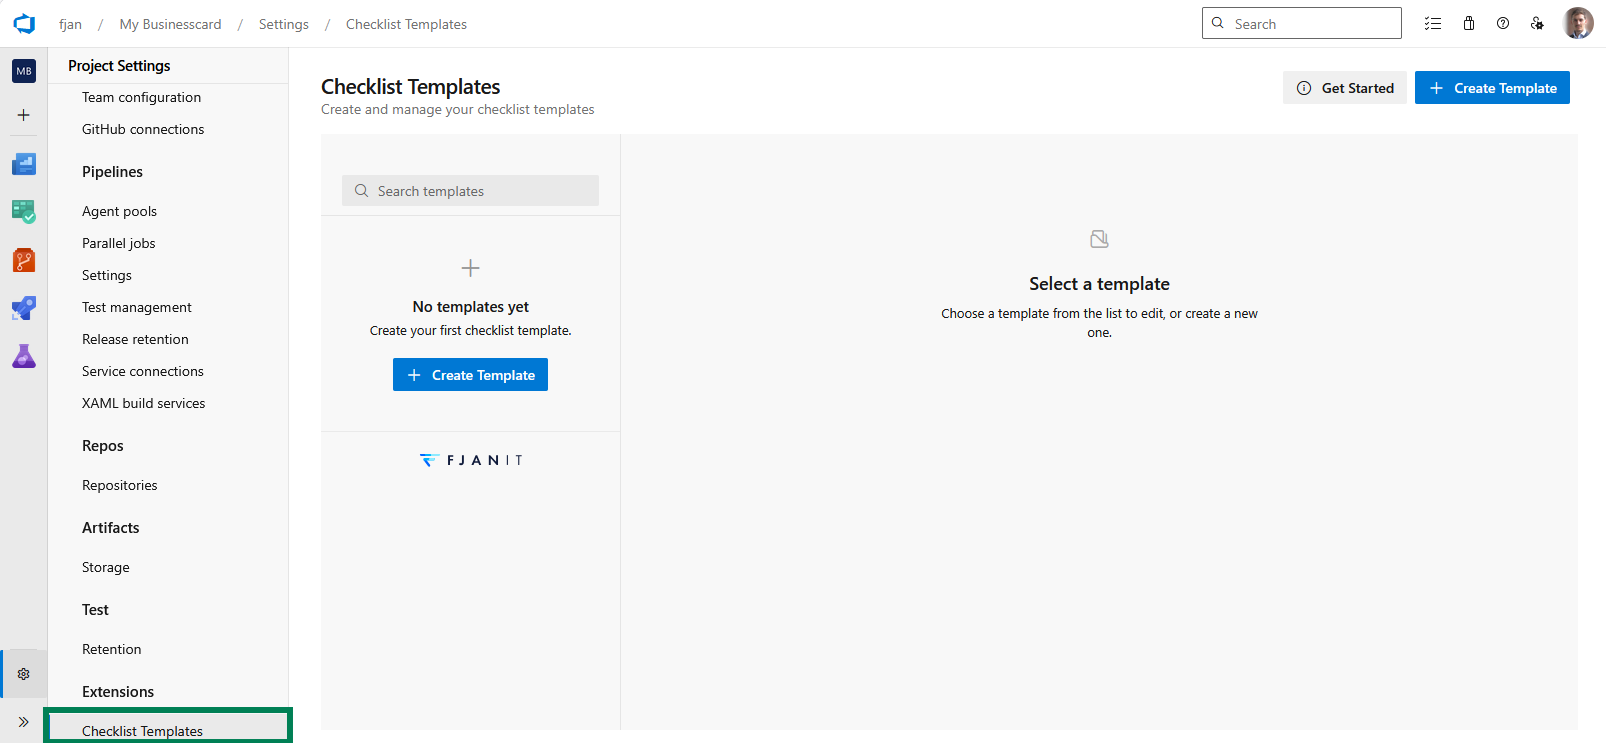
Templates are managed in Project settings, not at the organization level for day-to-day editing.
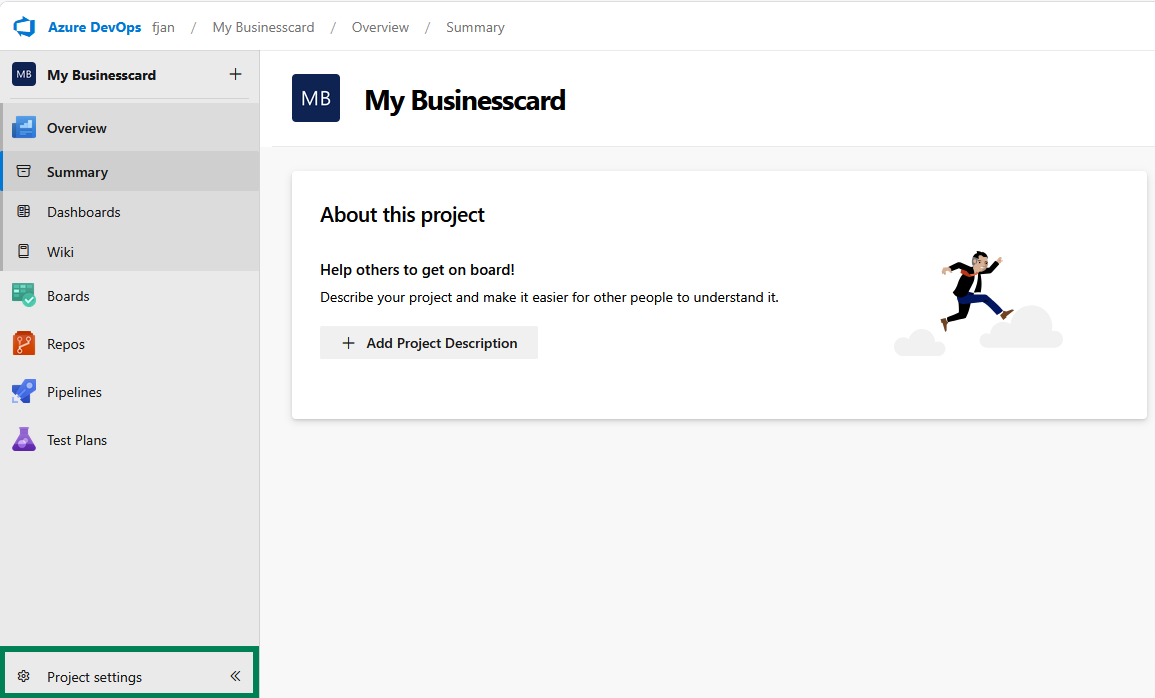
- Open a project in Azure DevOps.
- Go to Project settings (gear icon at the bottom of the left navigation).
- Under Extensions, open Checklist Templates.
You will use this hub to create and edit templates, set which work item types they apply to, and configure field mappings. See Working with templates.
Create or switch to a custom process
The checklist itself is stored in Azure DevOps work item fields. That means you must use a process where you can add custom fields.
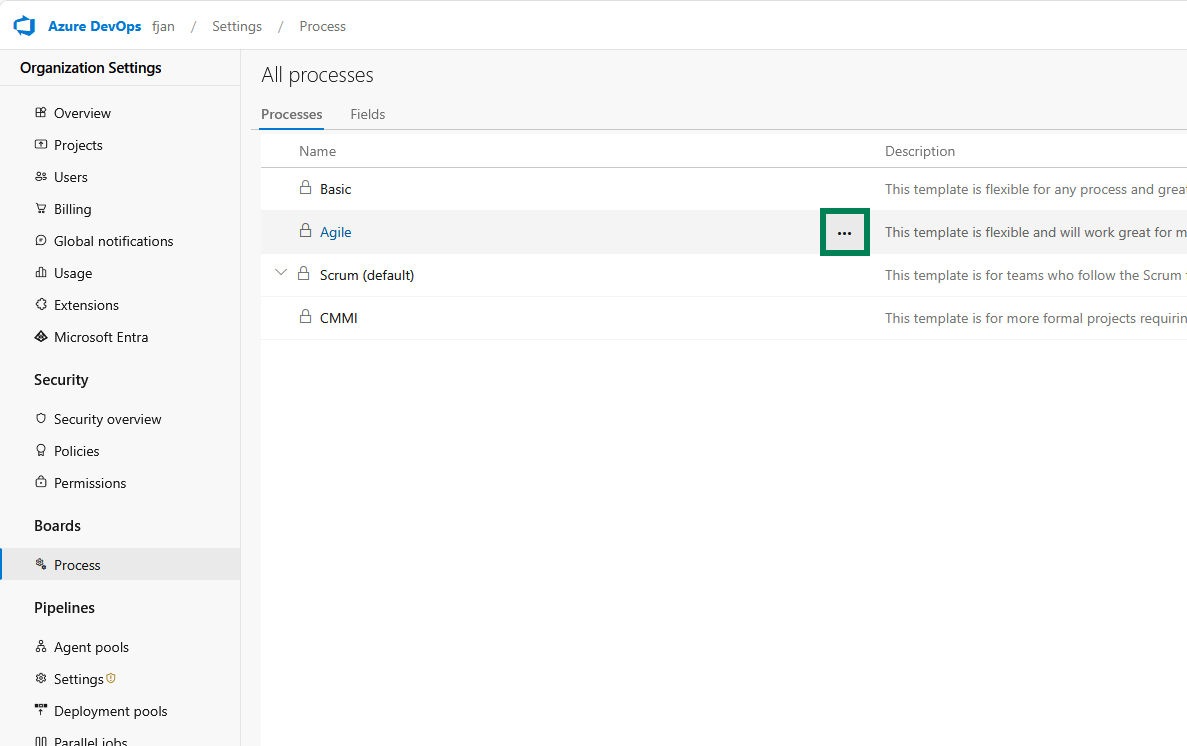
If your project still uses a system process such as Agile, Scrum, Basic, or CMMI, create an inherited process first:
- Open Organization settings.
- Go to Boards > Process.
- Find the system process your project currently uses.
- Open the ... menu and choose Create inherited process.
- Give the new process a clear name, then create it.
- Assign your project to that inherited process if it is not already using one.
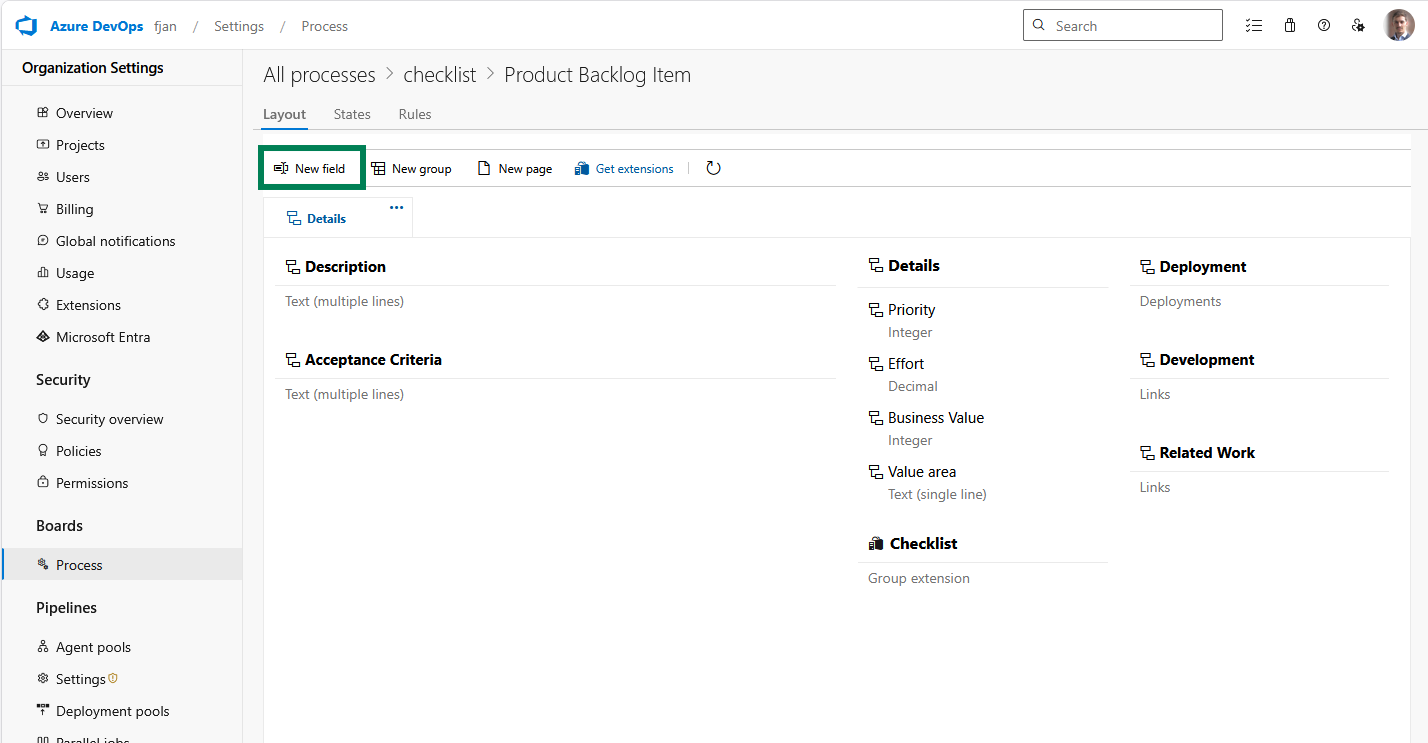
Add checklist storage fields to the work item type
Each template needs a mapped content field for every work item type it supports. The extension stores the checklist as markdown in that field, so the field must:
- Exist on the work item type.
- Be present on the work item form.
- Be writable for the user opening the work item.
For each work item type that should show a checklist:
- Open your inherited process.
- Select the target work item type, such as User Story, Task, or Bug.
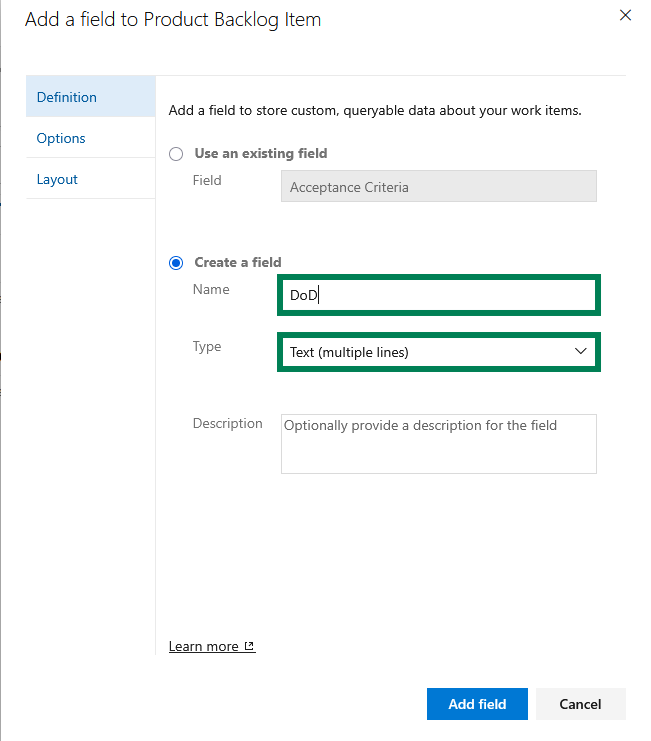
- Create a custom field for checklist content. A multiline text field is the recommended choice.
- Add that field to a group on the layout, for example Checklists.
If you want Premium automation features, you can also add:
- A Progress field (Single line text) for a formatted completion summary (for example
67% (4/6)). - A Complete field (Single line text) set to
Yeswhen the checklist is fully complete and cleared when it is not.
Those extra fields are optional. The checklist itself only needs the content field.
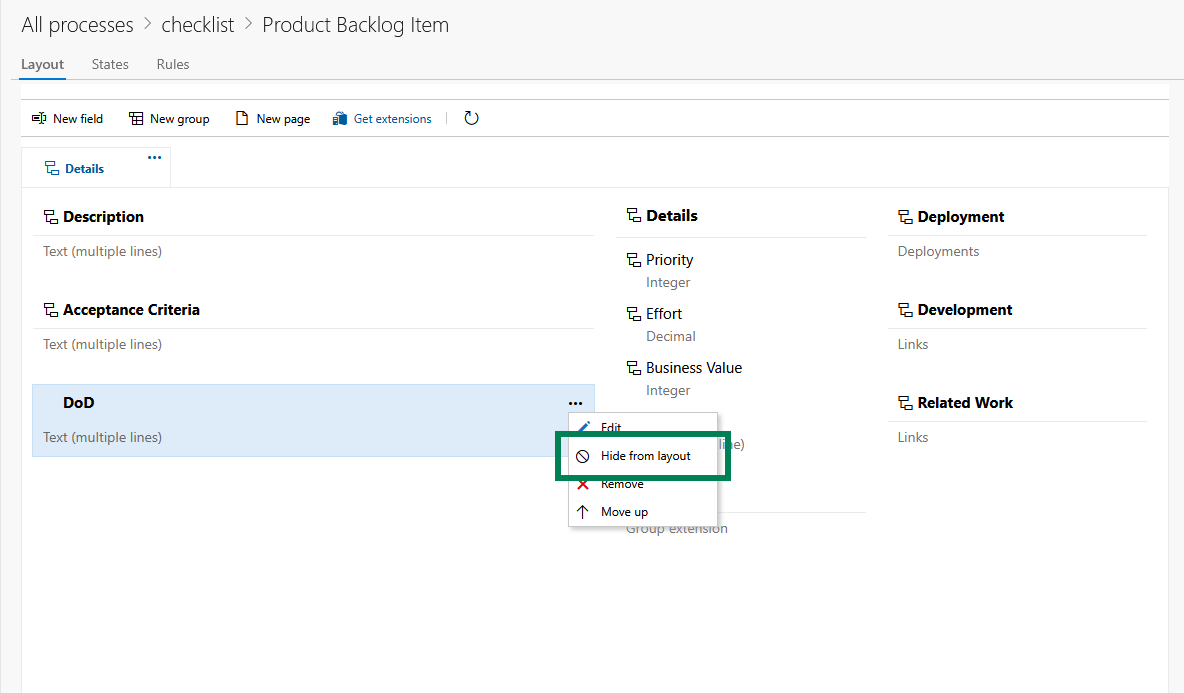
Hide the raw field from the form if you want
The extension renders the checklist in its own Checklist group on the work item form, so many teams prefer to hide the raw storage field after mapping it.
That is optional:
- Leave the field visible if you want admins to inspect the raw markdown directly.
- Hide the field from the standard layout if you want a cleaner work item form.
The important part is that the field still belongs to the work item type and remains writable.
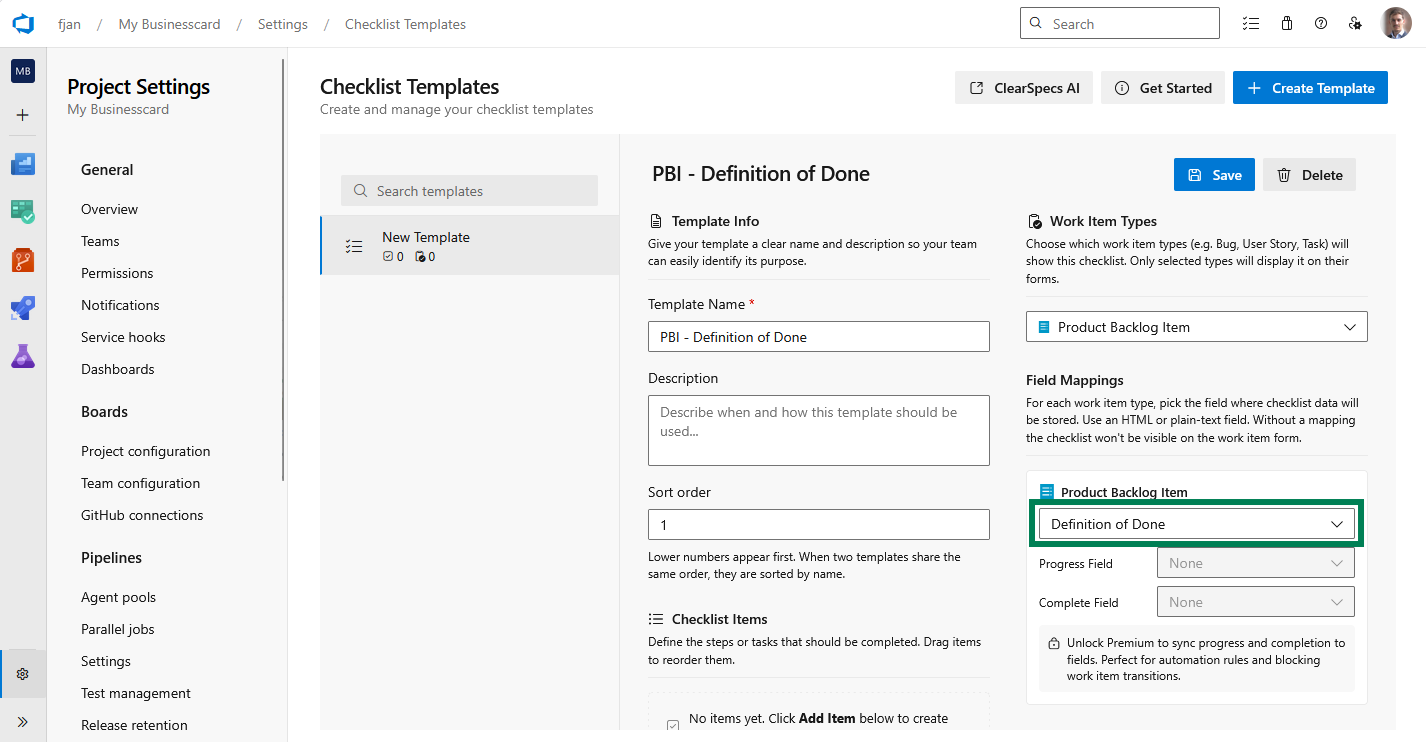
Create your first template
- In Checklist Templates, create a new template and give it a clear name (for example
Story - Definition of Done). - Add checklist items. You can reorder items later.
- Set Work item types so the template applies to the types you care about (for example
User Story). - In Field mappings, select the content field for each supported work item type.
- Optionally map Progress and Complete fields if you use Premium features such as board cards, rules, or queries.
- Save the template and make sure it is active.
The free tier includes up to two templates per organization. Premium unlocks unlimited templates and optional Progress and Complete field mappings for automation and boards. See Working with templates.
See the checklist on a work item
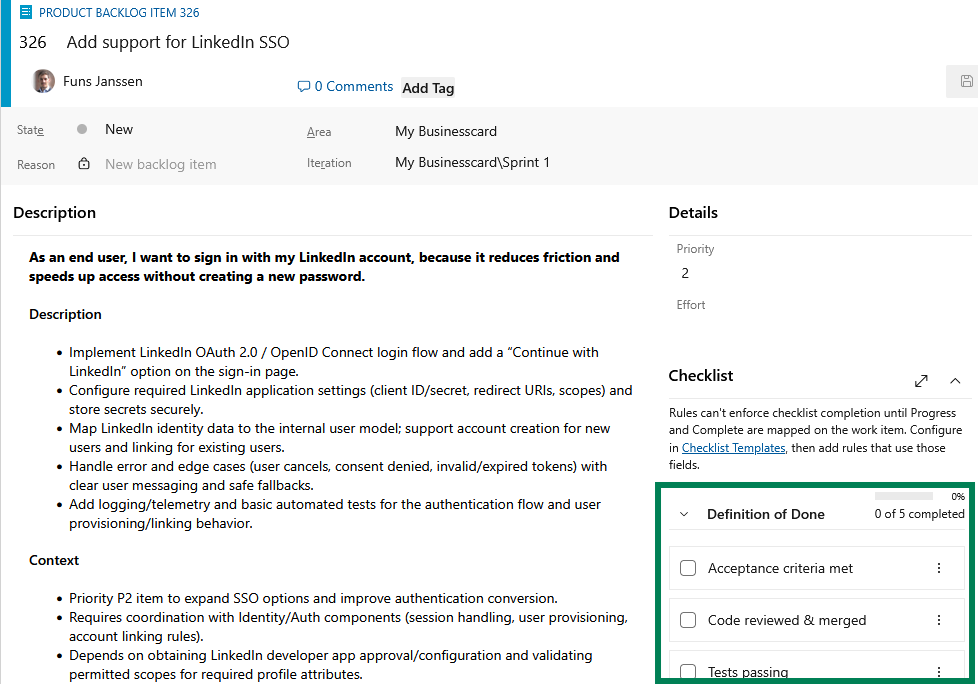
- Open Boards or Work items and open or create a work item whose type matches the template (for example a User Story).
- Find the Checklist group on the form. If multiple active templates match, the work item can show multiple checklists.
- Tick an item and confirm the change is saved back to the mapped field.
Templates appear automatically only when the active template matches the current work item type and any configured team or project scope. For the matching rules, see Applying templates automatically.
Troubleshooting setup issues
If the checklist does not appear or does not save, check these first:
- No templates available: no active template matches this work item type yet.
- Templates exist but no checklist appears: the template may be inactive, scoped to another project or team, or missing a content field mapping for this work item type.
- Checklist appears with a warning about a missing field: the mapped field is not on this work item type in the current project's process.
- Checklist appears with a warning about a read-only field: the mapped field exists, but the current user or layout cannot write to it.
When in doubt, verify the process field first, then the template mapping, then the automatic matching rules.